7 Tips to Help Improve Your Seascape Photos by Controlling the Waves
A Post By: Jim Hamel
When photographing outdoors, you generally take the world as you find it, and you have very little control over the elements. You cannot control the weather. The terrain is a given. You certainly cannot control the skies or the clouds.
But when photographing seascapes there is one thing you can control, and that is the waves. At least, you can control the appearance of the waves. This is a fundamental difference between landscapes and seascapes.
In landscapes you have generally static ground and foreground elements, while in seascapes you are dealing with a fluid substance that is in constant motion. If you just treat a seascape as a landscape, you will get an ordinary photo, but with some attention to the waves you can get extraordinary pictures.
You can actually control the appearance of the waves in order to add just the right mood and interesting effects to your photos. It is actually very simple to do; it’s all about controlling your shutter speed. In general, the slower the shutter speed, the more calm and serene the water will appear, while a very fast shutter speed implies power and action.
In this article, I will walk you through some shutter speed ranges that you might try in your own seascape photography next time you are at the coast. So here are some tips to help you take better seascape photos:
#1 Minimal Gear Needed
To photograph moving water successfully at various speeds, you will not need much in the way of extra gear. Other than a camera, a tripod, and perhaps a remote shutter release, the only necessity is a neutral density filter.
It is best to have a few different strengths of neutral density filters. A 10-stop filter is a must, and from there I recommend adding a 3-stop and a 6-stop filter. In a pinch, remember that polarizing filters typically reduce the amount of light reaching the camera by two stops, so you can use a polarizer as well.
#2 Controlling Shutter Speed
Coastal pictures are all about controlling the shutter speed, and you will usually find yourself trying to slow down the shutter speed. If you are shooting in one of the automatic modes, this is a good opportunity for you to step up Manual (M) mode. Just set the shutter speed where you want it, then if you can get the proper exposure by changing the aperture settings, great. But if not, use your neutral density filter to cut down on amount of light entering the camera.
This is also a rare instance where you might consider Shutter Priority (Tv or S) mode. Once you set the shutter speed, the camera will set the aperture for you. Of course, you could also use Aperture Priority (Av) mode and set the aperture with an eye toward where the camera is setting the shutter speed.
When you get to the coast, take a few test shots, Keep an eye on the histogram to make sure your exposure settings work for the mood you are trying to create.
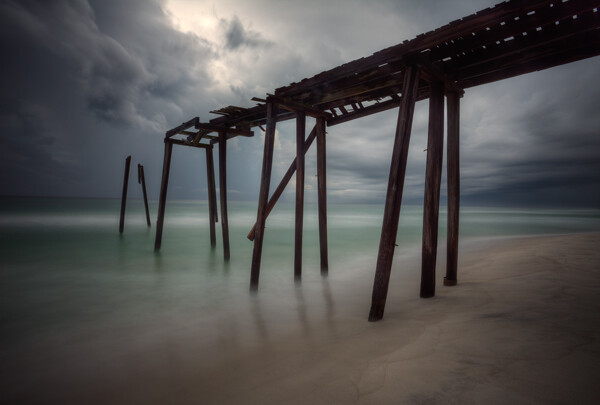
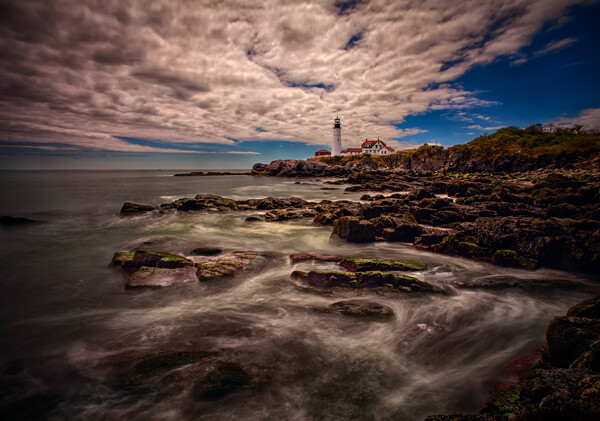
#3 Creating Flat Seas with Extremely Long Shutter Speeds (at least 10 seconds)
Most of my favorite seascapes were taken at shutter speeds of 10 seconds or more (sometimes a lot more). Under calm conditions this adds a sense of serenity to the seascape. Under other conditions the slow shutter speed can add some drama to the scene.
To accomplish this effect, you are probably going to need to use the 10-stop neutral density filter. If you are set up for a proper exposure before you put the filter on the lens, you will need to add 10 full stops of light to get the proper exposure once the lens is on the camera. If your camera is set up to adjust in 1/3-stop increments, that will mean 30 clicks (of your dial) of additional light.
This filter is so powerful that it leads to some challenges. You are going to need to focus and set your exposure before you put the filter on the camera. Once you put the filter on, you will not be able to see anything or focus. A great process for these long exposures is this article: Step-by-step Guide to Long Exposure Photography
In addition, keep in mind that the exposure will be quite long and the camera will need to be very stable. If you are on sand or other unstable surface, be sure to jam the legs deep into the sand to make it as stable as possible. If you are near the water, let a wave or two touch the tripod’s feet before shooting because the first wave will shift the tripod a little bit.
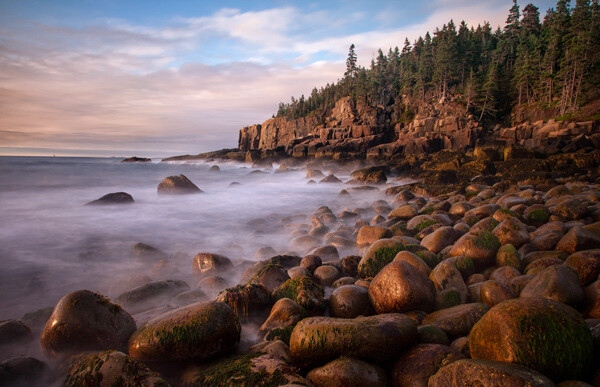
#4 Ocean Trails: Long shutter speeds (2-8 seconds)
Another great way to capture the sea is with a long shutter speed of at least a few seconds, but not so long as to blur everything out. The advantage of the speed is that it gives the viewer an idea of the rhythm, or currents, of the ocean. This range of shutter speed will often show trails in the ocean and give a general sense of the location of the waves.
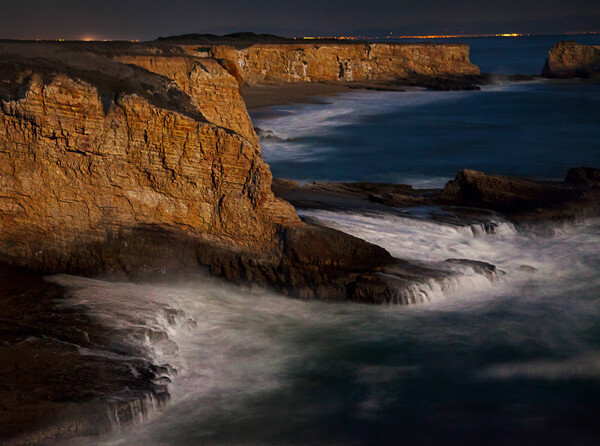
To capture this look, the shutter speed will ordinarily be between two seconds and eight seconds. That also means a neutral density filter, but often not the 10-stop filter. If you have a 3-stop or 6-stop density filter, those usually work best in this situation, depending on the amount of light available.
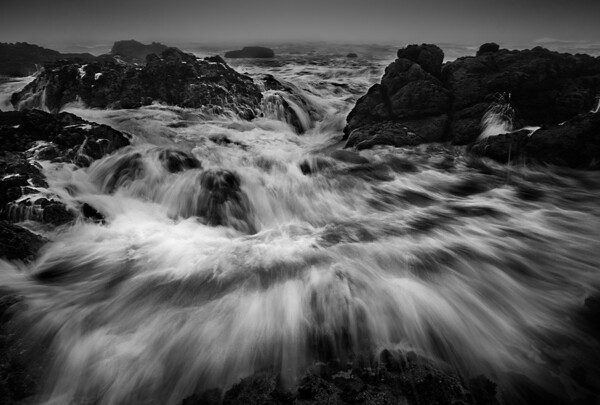
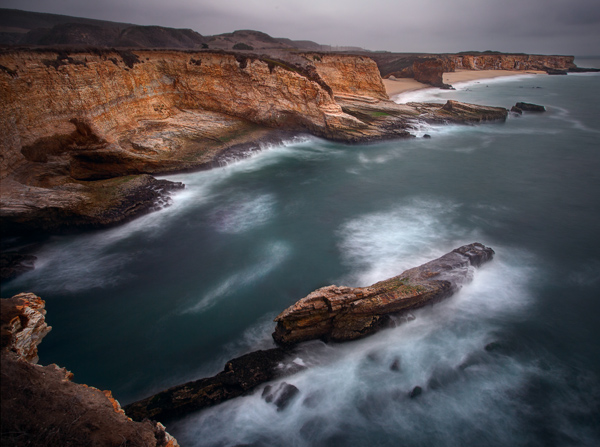
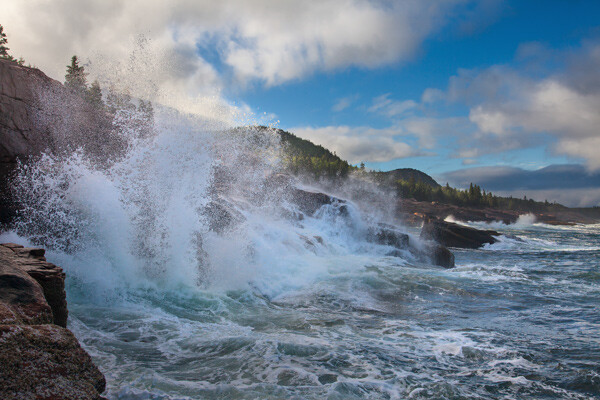
#5 Motion and Power: Moderate shutter speeds (1/8 – 1/2 second)
Sometimes you want the viewer to see the actual wave. It still helps to have a little motion to the wave though. This will convey both a sense of motion and give a sense of the power.
To accomplish this, you will typically need to slow the shutter speed down just a little bit. You will find the best shutter speeds for this range are between 1/8th and 1/2 of a second. At these speeds, you can still clearly see the waves, but the slower shutter speed takes the jagged edges off of them.
While you will still need a tripod at these shutter speeds (they are too slow to hand-hold your camera and get sharp images), you can often get away without using a neutral density filter by stopping down the aperture.
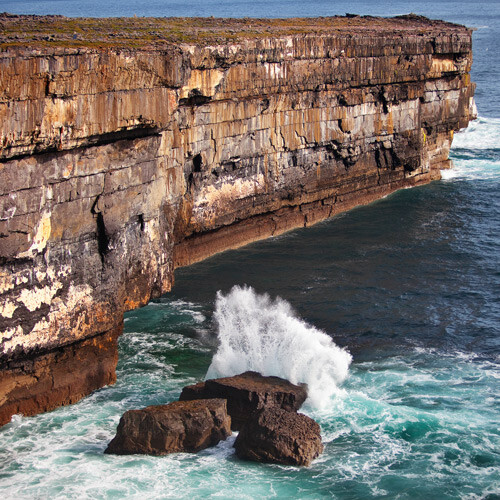
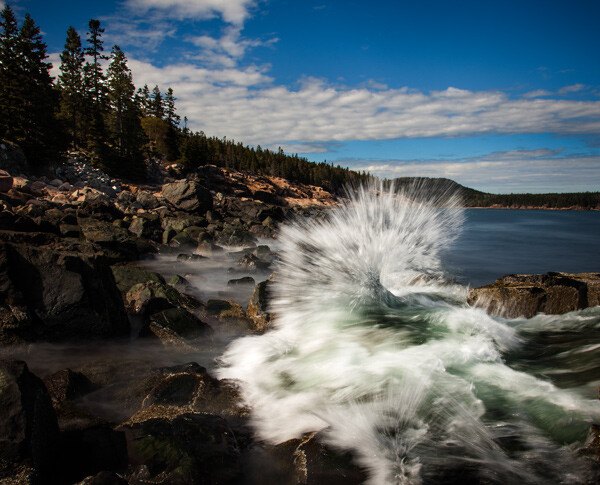
#6 Pure Power: Fast shutter speeds (1/500 and up)
Finally, there are days when the ocean is very active where you will want to stop the motion and really capture the power of the sea. A great way to do that is with a fast shutter speed. Speeds of 1/500 of a second and faster work best.
The good news here is that you will not need to use a neutral density filter. You can also ditch the tripod and just hand-hold your camera. These shots offer maximum flexibility and mobility.
A fun thing to do is try to time the wave at it crashes into a rock or the surf. This means a lot of trial and error, but when you hit one, the results can be spectacular.
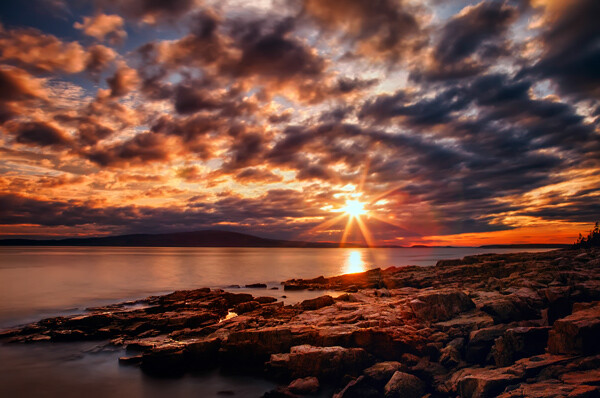
#7 Before You Go
Remember that the sea coast is a harsh and unforgiving environment. Salt water and electronics do not mix very well, and just the spray of the ocean can lead to serious camera problems (which, unfortunately, I have experienced firsthand). In addition, the terrain can be slippery and treacherous. If you are not careful, you can also find yourself stranded on some rocks in a rising tide (learned this one the hard way too, I’m afraid).
But if you are careful about what you are doing, there is no better place to be than on the coast at dawn or sunset. So get out there and give it a try, and if you have questions or need additional information just use the comments below.
If you enjoyed this article, you might also like...
Read more from our Tips & Tutorials category.

Jim Hamel is an outdoor photographer who lives in Southlake, Texas. He is the founder of Outdoor Photo Academy, a website full of free tips and simple, practical steps for improving your photography. You can see more of his work on his website.
No comments:
Post a Comment